Followers

Friday, April 25, 2014

Color inspired CAS Card

A simple CAS card for the Simon Wednesday Blog and  ColorQ challenge
Used a purple card stock for base. A white front, with a kraft brown panel with a purple paper lace.
A yellow sheer bloom along with a velvety green leaf.
A few rhinestones to finish off.
That's it. Too simple.


Thank you for stopping by, have a great day!

Star burst card

Made this Star burst card after a long time. I chose a white card stock, and the pattern paper is from the spring collection.
The bloom, I had cut it from another pattern paper, I like this flower's newsprint look.
Couple of leaves, and I had up cycled the twine, it came in a package material. It looked too useful to throw away. It is palm fiber.
Added the sentiment, on the designer paper, and continued along the star burst pattern. It is a card for a friend.
A floral button and two hearts as embellishments to wind up the card. 


A closer look at the bloom, and the palm fiber twine.


The sentiments on the star burst panels.

Posting this card with the 


CASE Study, I like the flower and the sentiments attached with the flower, and all the different shapes in the inspiration card. I added the flower, but added the sentiments on the star burst panel. Added 2 hearts to give the different shapes look in my card. this is my take on the inspiration picture.


I love the flower, and the color orange in here, and of course the twine. These were my inspiration from the above card. So my card is mostly orange, with a flower and of course the twine.

CASE Study just one more casing of one of my favorite artist in the card making world. I am casing
Dawn Olchefske, she is an amazing card maker, I love all her works.
I made the star burst card with her inspiration, but a different look.


Thank you for stopping by, have a great day!

Thursday, April 24, 2014

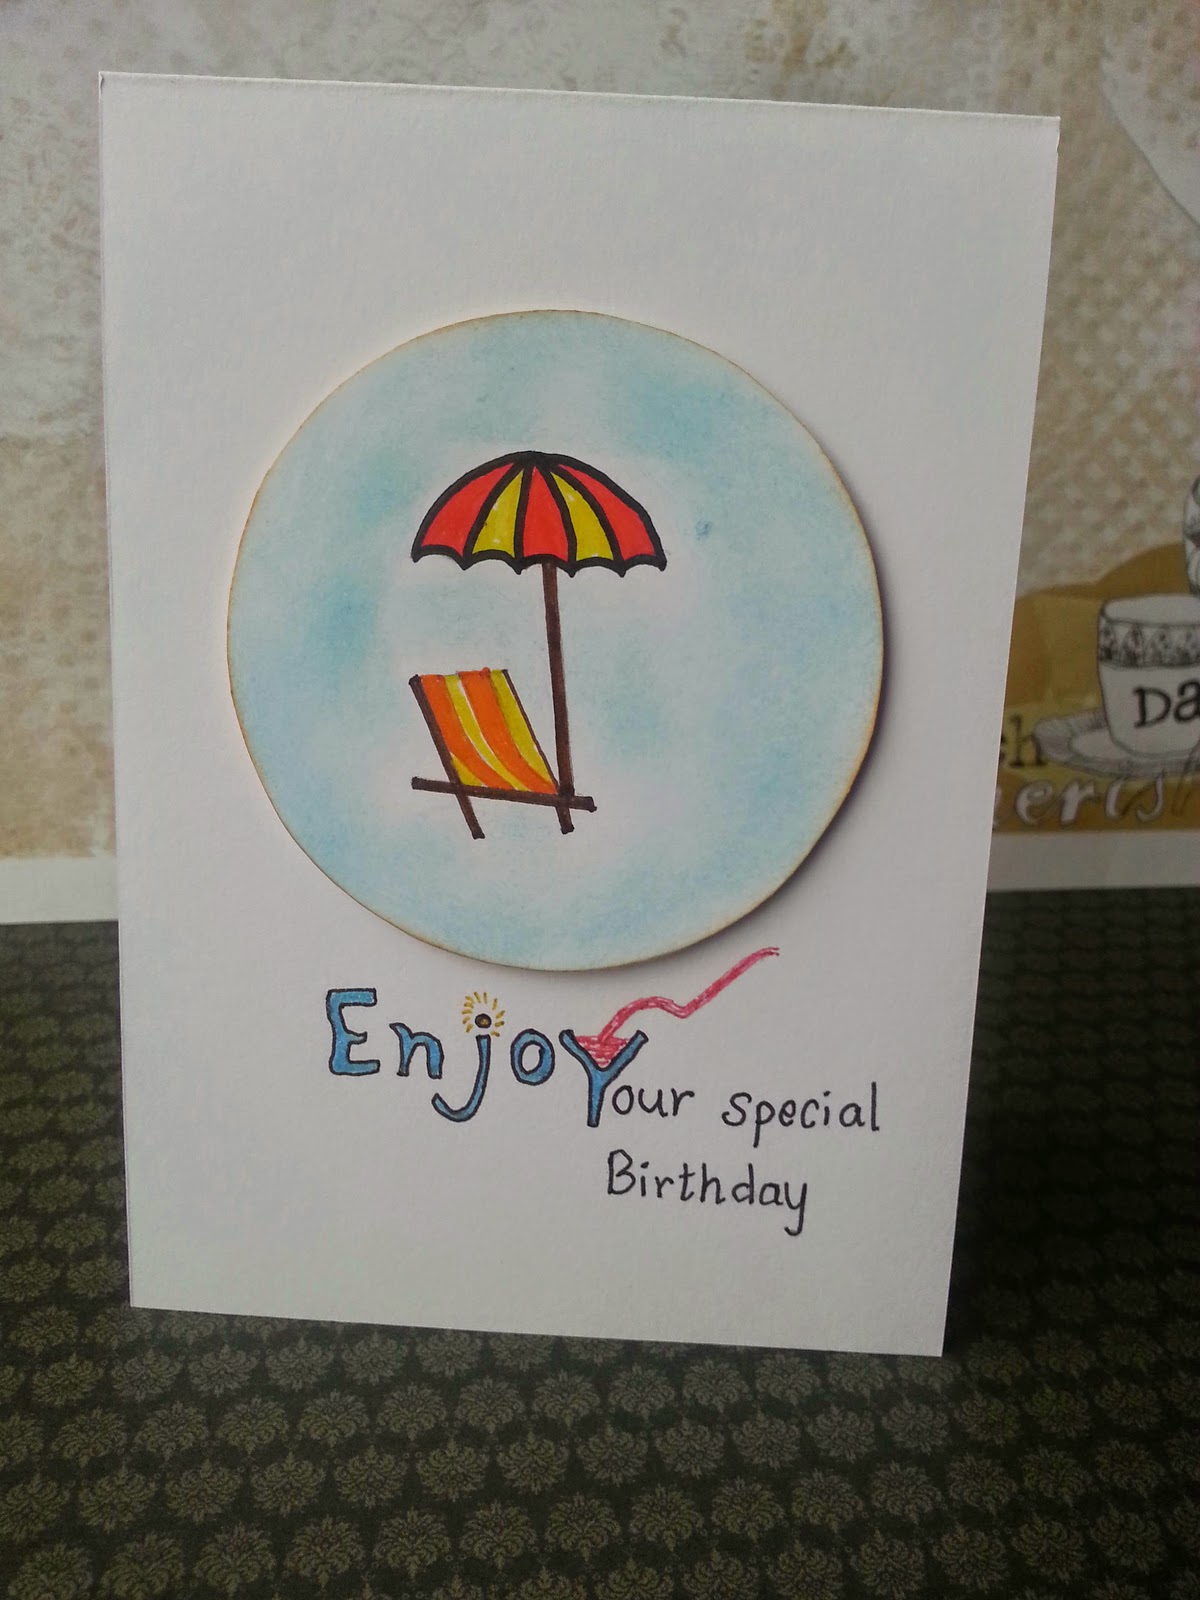
A special card

Today when I sat down to make this card, I set a couple of goals for myself.
Firstly, I wanted to draw my own image.
Secondly, I wanted to write the sentiment,  and finally keep it CAS.
This card has pushed me out of my comfort zone, and surprisingly I like how this card has come out.
I drew and colored the umbrella and the beach chair...yay I managed!
Drew a circle and I cut it with scissors, no big shot used for this.
Sponged light and dark blue ink for the scene, even though it is pretty hard to tell if I had used two inks ;) and distressed the edges with orange ink.
I wrote the sentiment with black fine tip pen, and colored with a turquoise gel pen. 'Enjoy' is the main word of the sentiment, made some sun rays around the dot of 'i', and colored in a tiny drink plus straw in the 'y'. Continued from the 'y' here to the rest of the sentiment.
That's it. Managed to do a card as desired!


Coloring

Linking this card for the following:


 and 

CASE Study, My blog is just over 2 months, and this will be my first time entering for a DT spot, 
I am CASing Valita's work here, it was this card of hers, which got me into sponging, and there is no looking back since then, I am addicted to sponging now.


Thank you for stopping by, have a great day!

Wednesday, April 23, 2014

Fantasy garden ~ straw blow painting

My first time doing a straw blow painting, chose trees to experiment since I thought trees are pretty easy, my thoughts before I got started. Of course, trees weren't that easy as I was thinking they would be.
Call me crazy but yes I chose blue and orange to do my trees. These are trees from a fantasy world, like Alice in Wonderland ;)


Used my daughter's Chinese painting  colors for this project

The process of blowing the straw, I surely have a long way to go!

Posting this to the Just Us Girls Challenge
Muse : Challenge #64, I really likes the colors in the inspiration card, but have done trees instead of the flowers.

City Crafter Challenge Blog

Casology
This is my take on a garden, bit different type of garden though!


Thank you for stopping by, have a great day!


A funny inspiration

Firstly, I want to tell you about the inspiration behind this card.
Last week while I was teaching, the students scholastic books delivery came in, after giving away everyone's books, at the very bottom of the box were some posters. Too cute and funny to be ignored, when I opened the poster I was laughing pretty hard :D .
I had this crazy idea of altering the sentiment a bit and using it on my cards. So this is how I end up making this card. 


My inspiration poster!

The hanging monkey is a free digi image I got it from pinterest. However, I had to draw the extra length of the vines and some leaves, also the small tiny vine and leaves.

Colored the image in shades of green and brown. Used green marker for the vines, and a brown and peach pencil crayon for the monkey. Sponged blue, green and brown pigment ink to the edges only. Since the sentiment was my main idea, it is printed directly on the card front.

It looks CAS to me but I am hoping that I haven't ruined the CAS look of the card, there is still plenty of white space.

Posting this to Less is More


Thank you for stopping by, have a great day!

Tuesday, April 22, 2014

Cure for Monday Blues

Another excellent inspiration picture. The word "Love" on the circle caught my eye instantly. I wanted to do something with that. So chose red besides the neutrals black and white.
And added some random circles on the card. A cute glittery heart embellishment. The look is almost CAS. I am a die hard fan of CAS cards!


Posting this with the Cure for the Monday Blues


Thank you for stopping by, have a great day!


Monday, April 21, 2014

Chicken nuggets with Indian twist!

Chicken nuggets is any child's favorite dish, correction even adults too ;)
I am very particular about food, I am not a foodie but yes it is a big deal to me, about how the food is made?, under what conditions?,  what oil and what not... So most of the time I cook my own food unless I am traveling.
 This dish is an all time family favorite, and I am happy to let my kiddos munch on it since it is not deep fried as the usual chicken nuggets.


Ok, lets look at the ingredients.
You will need:
750 gms of boneless chicken, cut into small cubes
4 pods of crushed garlic(use more if the garlic is tiny)
4" crushed ginger
1tsp red chili powder
1 pack bread crumbs
2-3 eggs whisked
 salt to taste
a steamer
mincer
oil for deep frying for later on

Procedure:
1. Put the steamer on the stove for at least 10 minutes before you start.

2. Add the chicken, ginger, garlic, red chili powder and salt - mince all to a paste.


3. Spread the minced paste in the steamer, not too thick nor too thin either, and steam it for 10-15 minutes, till the chicken is cooked.


4. The steamed chicken hardens up pretty nicely, now cut it in desired shape.
(I sometimes cut a burger patti size and save it for burgers too).
Repeat the steaming and cutting till you are done with all your chicken paste.


5. Dip the cut chicken nuggets in whisked eggs, and roll in the bread crumbs and stack it in a container. 
6. Once all done, store it in the freezer, the nuggets need to be completely frozen  before they are ready to be fried.


7. Heat a small pan with around 2 TBsp oil, and remove the nuggets from the freezer(take out how many pieces you need), and fry immediately, till golden brown on each side.

That's it!
It is very simple, needs more preparation time than cooking, but it is worth the effort. I usually do it only once a month. I make double the size of what I had mentioned here. It sits in your freezer, and you can use it as and when.

Hope you try and enjoy this darling dish.

Thank you for stopping by, have a great day!


Quilled hearts

This is a card on which I haven't done any stamping. Only sponging, some random faux stitches. Added two Quilled hearts, and a tiny heart with red glitter on it.
A simple looking but plenty of time spent on this cutie!
Hand cut letters to finish off the card.


Posting this card to the Catchy Challenges


Thank you for stopping by, have a great day!